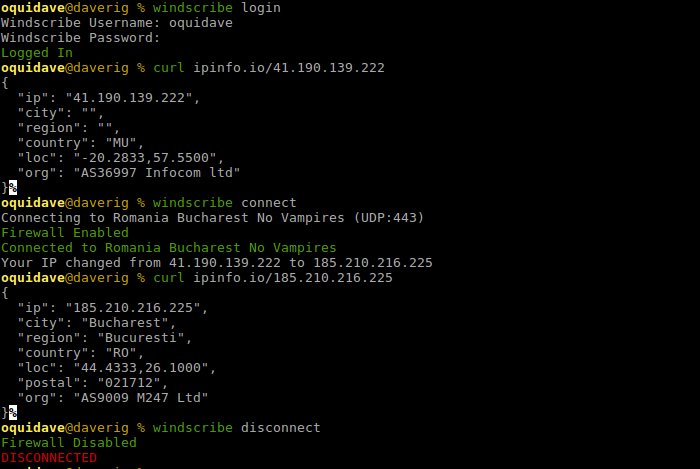
Windscribe is a new VPN service that’s been operational for a little over a year now and they’ve been steadily growing, adding features based on customer feedback. Like many other VPN services, they offer browser add-ons for the big names; Google Chrome, Opera, and Firefox. They have a Windows desktop client and they’ve recently launched a beta for Linux. I had a chance to try it out and thought I’d share with you my experience of setting it up. — Windscribe (@windscribecom) July 20, 2017 You can still use the OpenVPN config file method if that works for you as it is fully supported. However, I think the native Linux app method is a little easier. You will need to be running one of their supported distros; Ubuntu 17.04, 16.04 or 14.04; Debian 8 or 9, Fedora 22+ or CentOS 6+. Currently, only x64 systems are supported. To do this, first, head on to Windscribe’s Linux page and get the .deb binaries for your respective OS. I used Ubuntu 14.04 LTS. 3. Add the repository to your sources.list 4. Run sudo apt-get update 5. Install windscribe-cli 6. Login to Windscribe 7. Connect to Windscribe
If you need help? Simply run 8. Disconnect the VPN type windscribe disconnect To connect to any of the free servers, simply run windscribe connect (country abbreviation eg. GB for United Kingdom, de for Germany, us for the United States and so on.) Upon sign up, you get 10GB of free bandwidth. This is by far the most generous allocation of any VPN service out there. Give it a try and tell us what your experience is.