With a crop feature, you get to remove unwanted parts of your photos after taking them. This means you can still get that perfect photo even after taking it, by cropping the parts you don’t want to see out. In this post, we’ll take you through the step-by-step process of cropping your photos on your iPhone. Read through. READ MORE: How to Take Full Web Page Screenshots on iPhone and Mac.
Crop Photos On iPhone
Follow the step-by-step process below to be able to crop photos on your iPhone.
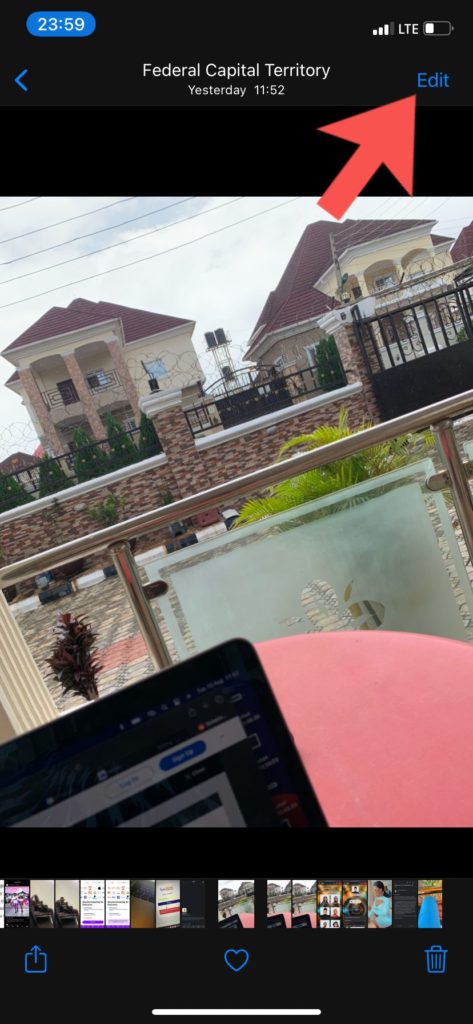
Open the photos app on your iPhoneSelect the photo you want to crop and tap on Edit
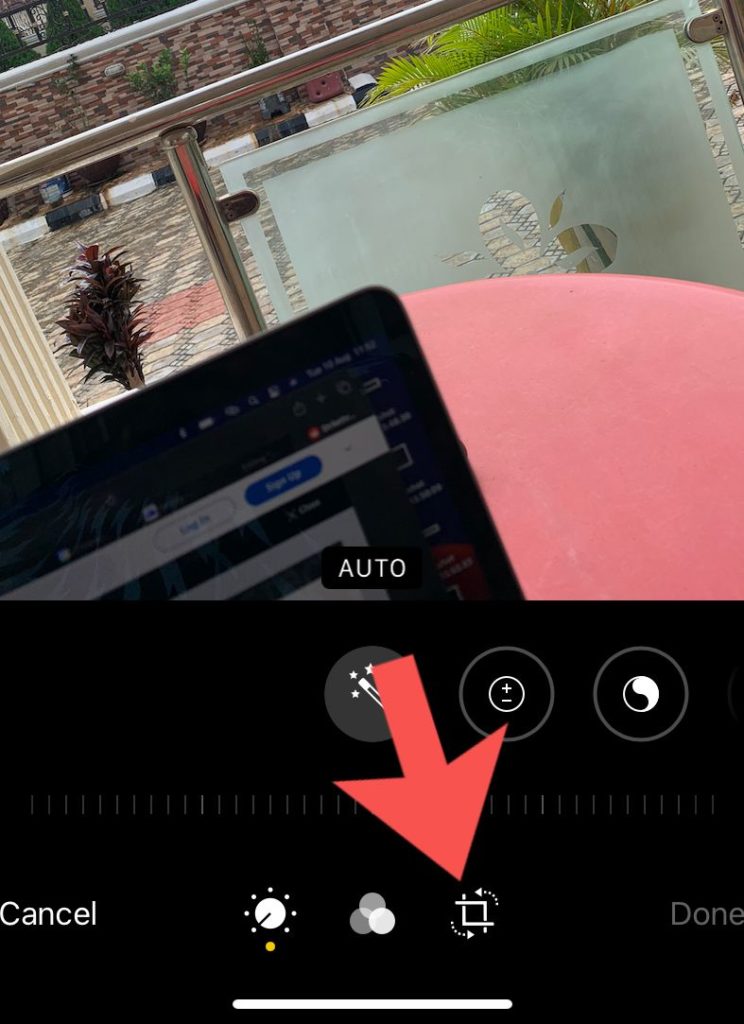
Select the Crop icon. It’s the icon on the farmost right that appears as one of three icons under your photo
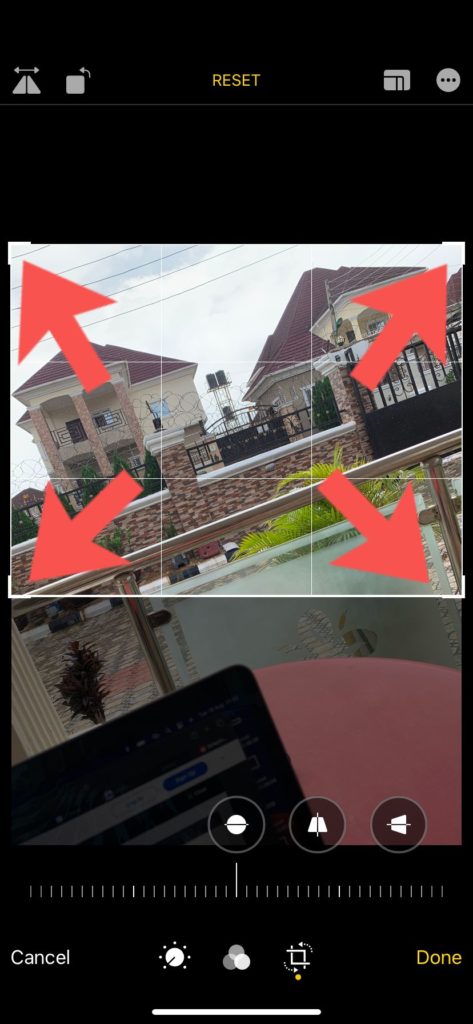
Drag the corners of the image to resize it and crop whatever part you want to.
Tap on Done.
Restore a Cropped Image to Original
You can also restore a photo back to its original form if you please. Maybe the crop wasn’t a good idea and you need the original photo back, iPhone edits can be reverted back in a couple of clicks. Follow the steps below to restore a cropped image to its original copy.
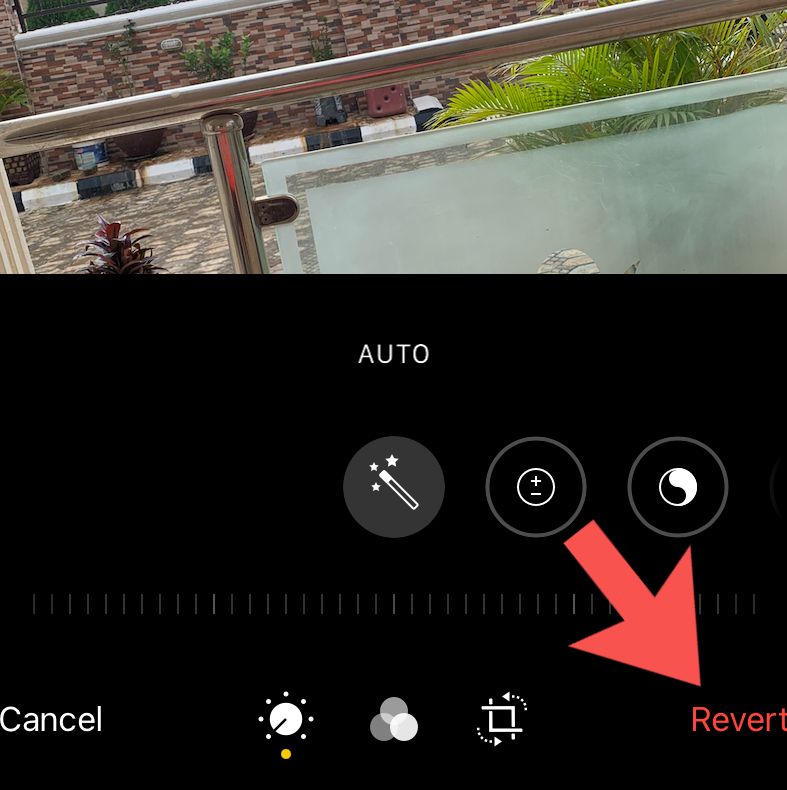
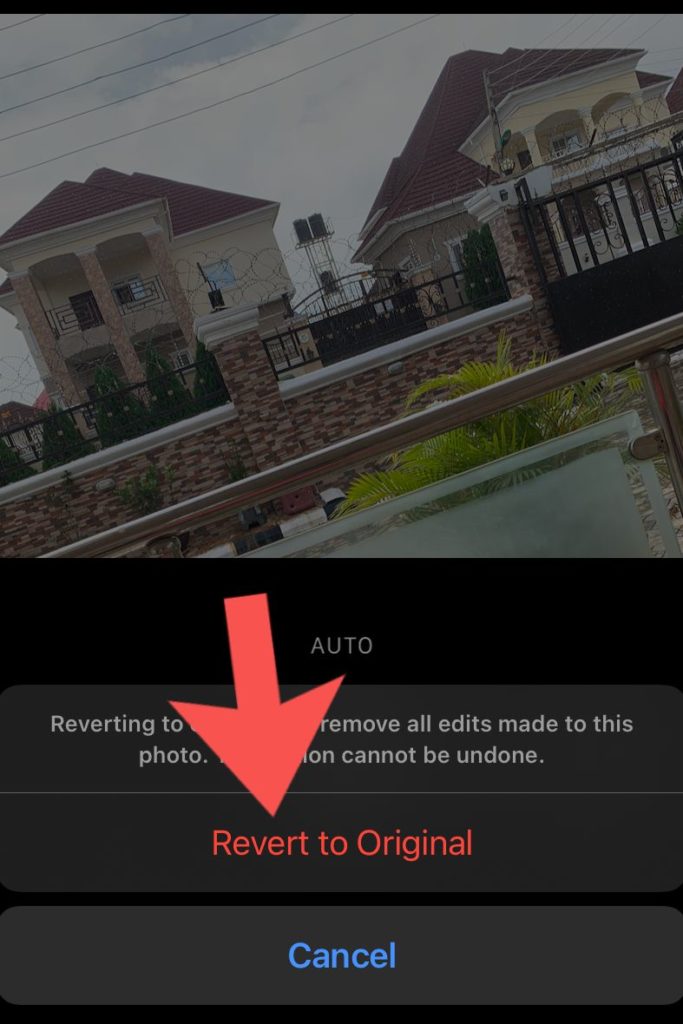
Open the cropped image you want to restore in your Photos app.Tap on Edit.Choose Revert. It’s located at the bottom right corner of the screen.
Select Revert to Original.
The photo is reverted to its original form
And that’s all you need to know about how to crop photos on your iPhone and also revert them to their original form. Please talk to us via the comments section if you get stuck in a particular stage. We’re more than glad to help out.