Before now, the first step would have been to print out these documents, sign them manually, scan them, then send them back to the senders. But these days, the whole process has been digitized. There’s no need to go through the manual steps when your iPhone solves your problem and makes your life a tad easier. In this post, I’ll take you through how to sign a document with the iPhone Notes app. It’s a lot easier than you’re thinking. You should read through. READ MORE: How to Scan a Document With the iPhone Notes App
Sign Document With iPhone Notes
Follow the steps below to sign a document with your iPhone Notes app.
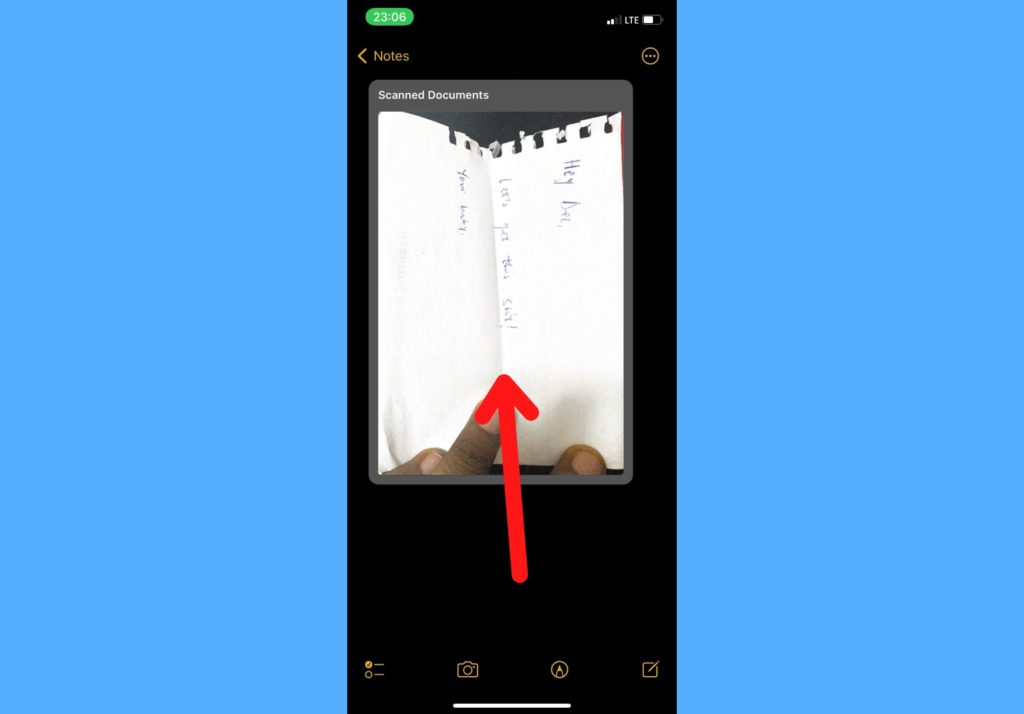
Open the Notes app on your iPhone.Open a Note where you have a scanned document in it. Tap the document.
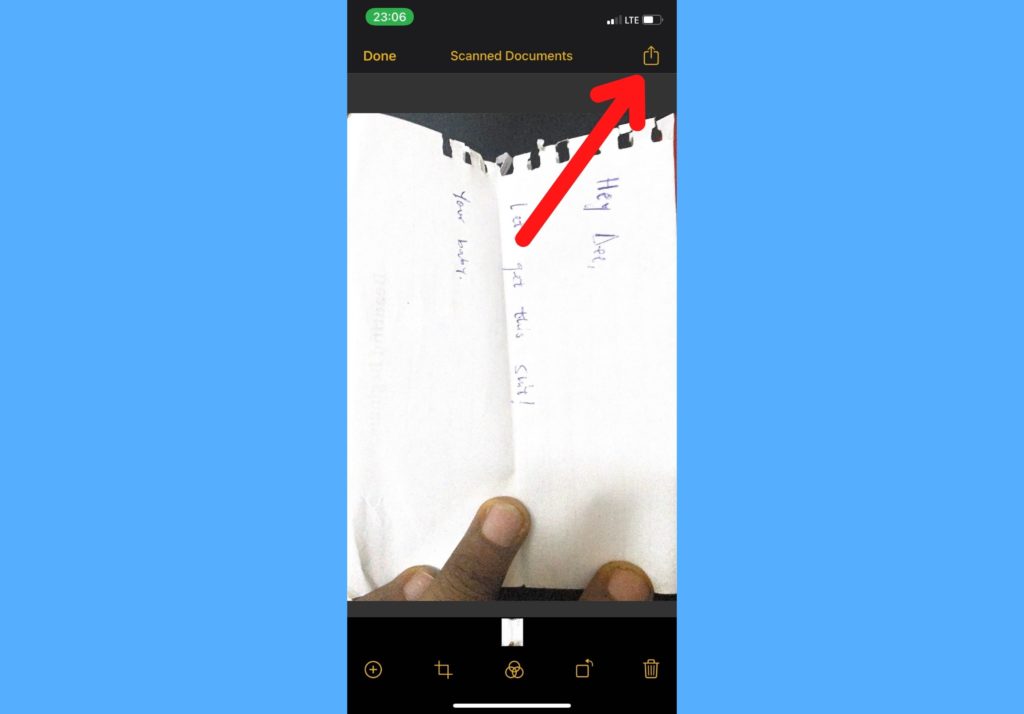
Select the Share button located at the top right corner of the screen.
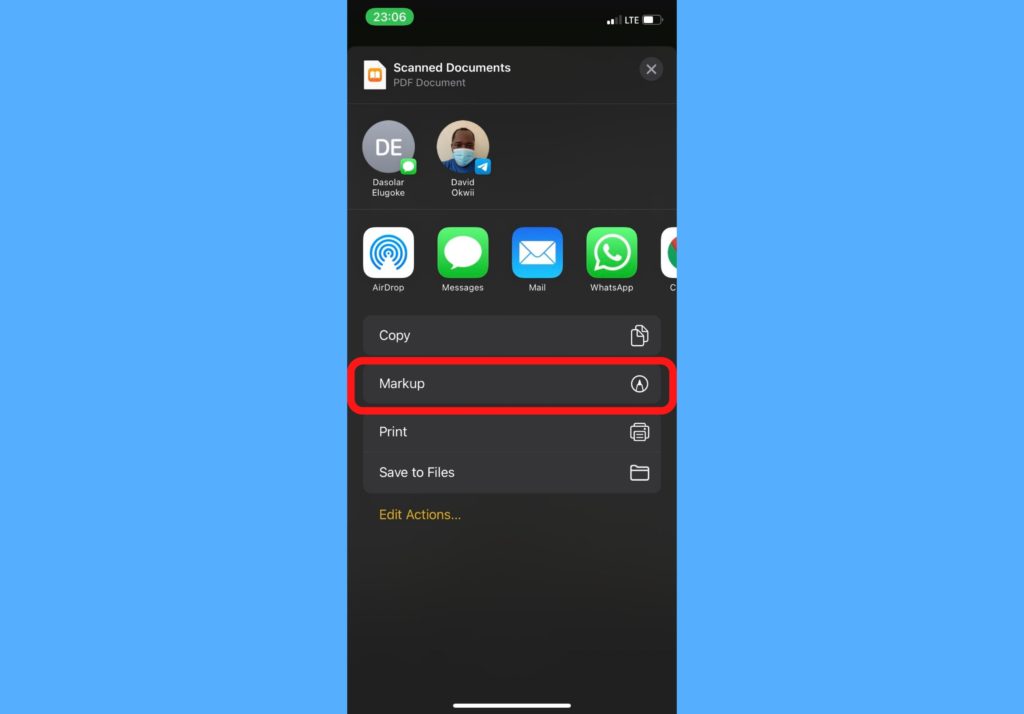
Select Markup.
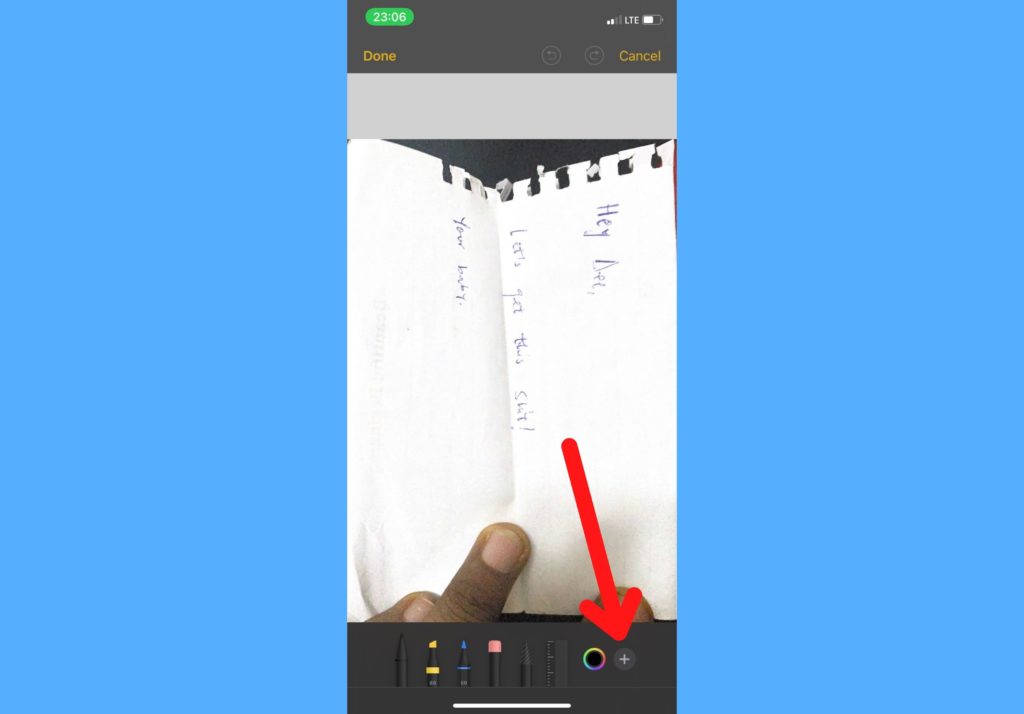
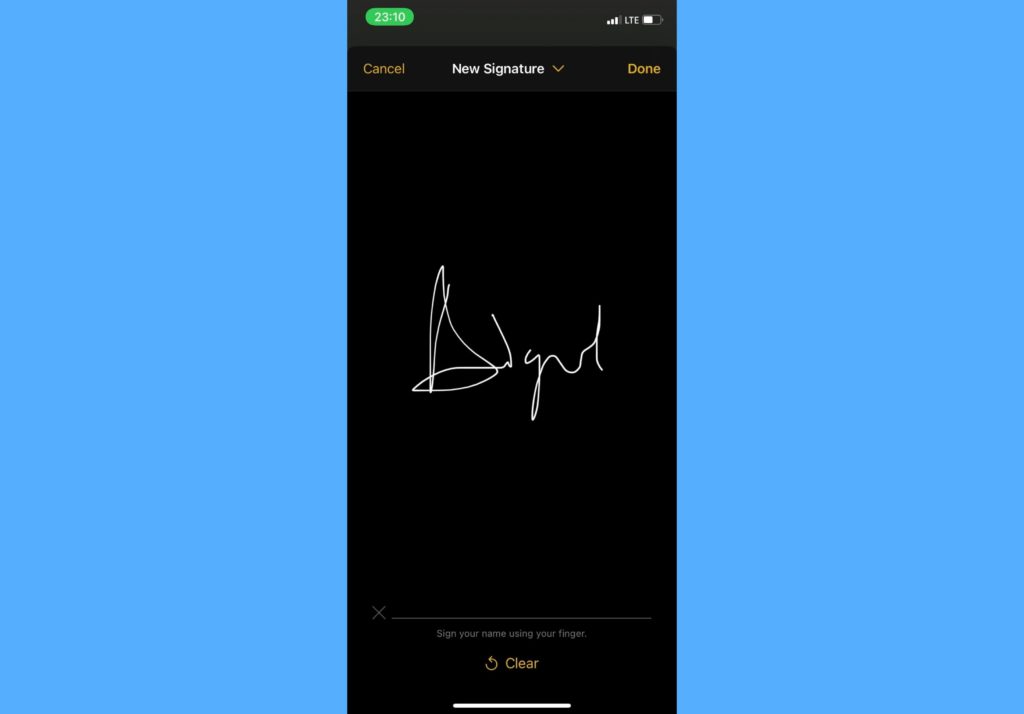
Tap on the + button and select Signature.
Select a signature if you already have one saved. If not, use your fingers to draw one on the screen.
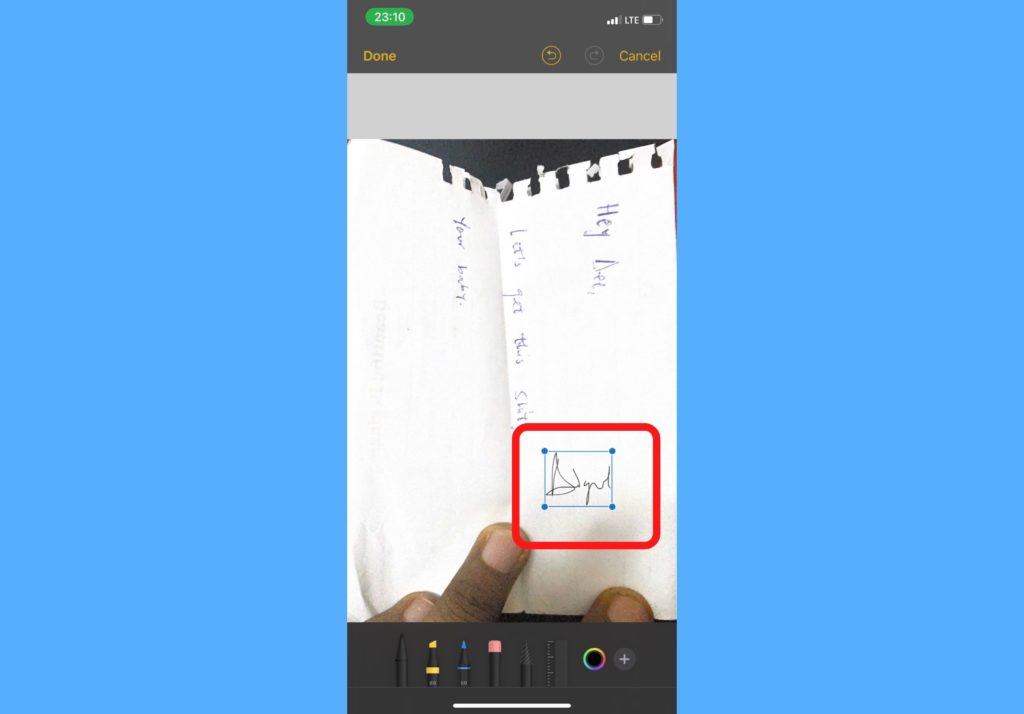
Select Done.Resize the signature and drag to the appropriate place.
Select Done.
It’s best when you have your signature saved so that for subsequent uses, you don’t have to draw it every single time. You just need to select and place at the appropriate place. Have you tried this out? Do let us know how it went in the comments section. And if you’d like us to cover anything else around this. We’re happy to.