Enable Windows 11 Multitasking
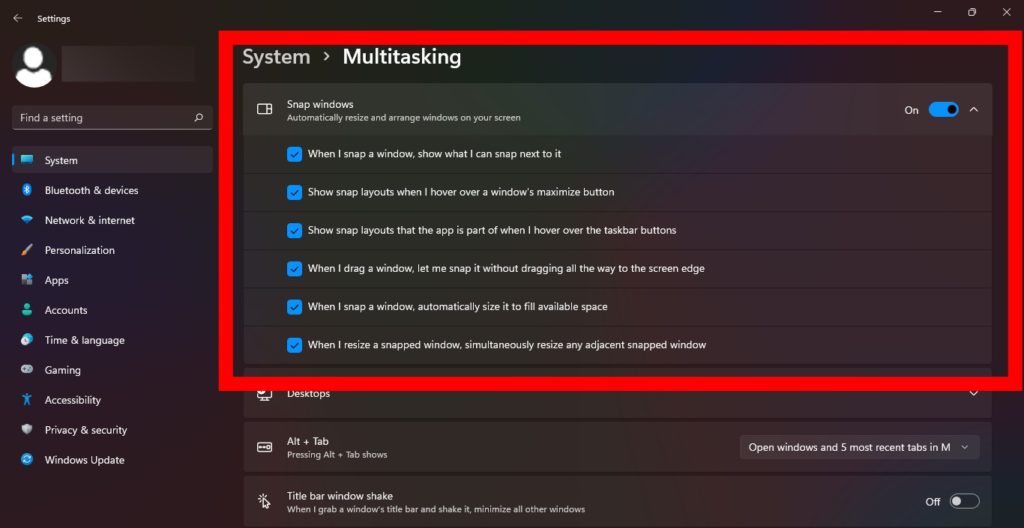
The Snap windows option (for multitasking) is enabled by default and you should be able to use it straight away. But if by chance, yours isn’t enabled, here’s how to enable it from your Windows settings:
Open the Settings menu on Windows 11 (You can finds the Settings icon on the tools bar at the bottom of your screen). Alternatively, use Windows + I keys.Next, go to the System menu.Select Multitasking.Then, toggle-on the Snap windows option to enable it. Also, tap on the arrow-down button and make sure all the other options are enabled.
How to Use Multi-Windows on Windows 11
Once you have enabled the Snap windows opting, you can begin multitasking on Windows 11. Here’s how:
Open any app in Windows.
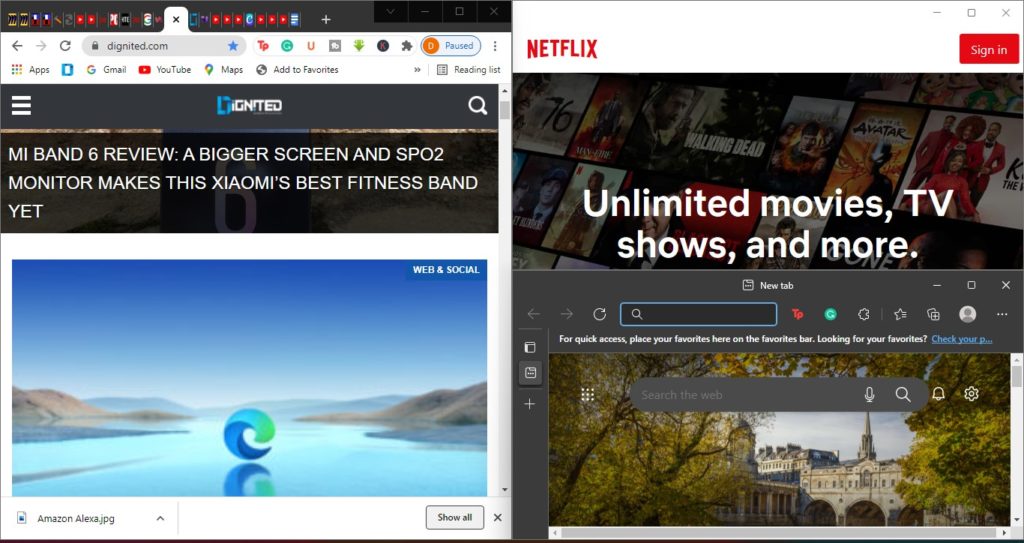
Then, hover your cursor over the Maximize icon in the menu bar of that app. You should then see the option to use multi-window.Select your preferred style.
Windows provides 4 multitasking options to choose from: The 2:1 Arrangement lets you keep one app in the one-third area on the right side, while the second app takes the left side. The three Apps Window lets you use three different apps at the same time. Also, there are options to split your Window in half and into 4 parts.